Template Types
RL Catalyst supports the following template types SoftwareStack, OSImage, CloudFormation, Docker, ARMTemplate. You can create various templates using these template types.
Software Stack: Software Stack Template type allows you to create a blueprint with set of cookbooks that work sequentially to produce a result.
OSImage: OSImage template type allows you to craete blueprint with the help of VMimages
CloudFormation: It simplifies provisioning and management on AWS. You can create templates which is in JSON format for the service or application architectures you want and have AWS CloudFormation use those templates for quick and reliable provisioning of the services or applications (called “stacks”).
Docker: Docker provides an integrated technology suite that enables development and IT operations teams to build, ship, and run distributed applications anywhere.
ARM Template: An Azure ARM Template is a JSON file that captures the infrastructure requirements of your application. An Azure Template defines a number of related resources that are required by your application. When an Azure Template is deployed on Azure, Azure Resource Manager ensures that all resources are brought to the specified states so that your application runs under the exact desired environments.
Templates
Templates will helps to deploy applications on existing infrasturcute without having need of launching new instances. Templates internally contains roles or cookbooks. With the help of templates also you can deploy different applications.
Adding a New Template For Software Stack Template Type
- From the main menu click on Settings
- Once you click on Settings, from the side menu click on Gallery Setup
- Click on Templates
- Click on New button provided
- Enter the template name in the Template Name field
- Upload an Icon by clicking on the Browse button.
- Choose the template type ‘Software Stack’ from the Template Type drop down list
- Choose the Organization from the Organizationdrop down list
- Select the Cookbooks from left frame and Click the arrow button to add to the Order Runlist. You can deselect the selected Cookbooks from the Order Runlist by clicking the arrow button to the Select Runlist box again
- You can customize the order of Order Runlist. First select the item and then use the up and down arrows provided to change the order of the Order Runlist.
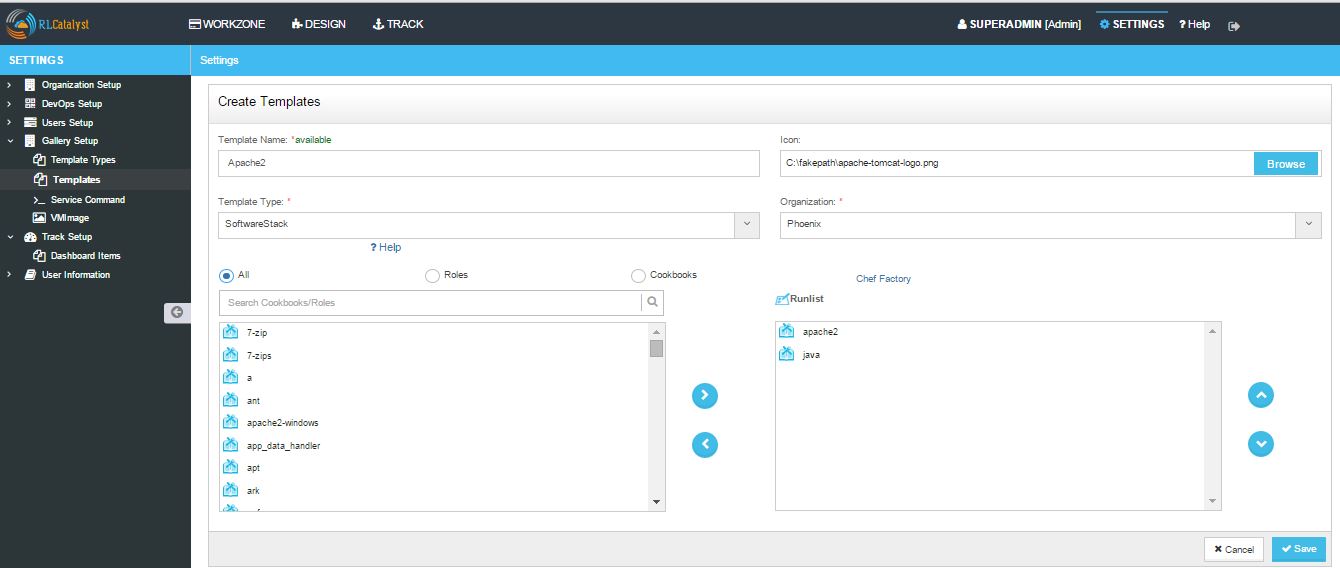
- Now new template is added and available in the Templates list
Adding a New Template For Docker Template Type
From the main menu click on Settings
Once you click on Settings, from the side menu click on Gallery Setup
Click on Templates
Click on New button provided
Provide a template name in the Template Name field
Upload an Icon by clicking on the Browse button.
Choose the template type ‘Docker’ from the Template Type drop down list
Choose the Organization from the Organizationdrop down list
Choose the Docker repo
Add Docker Repo Path
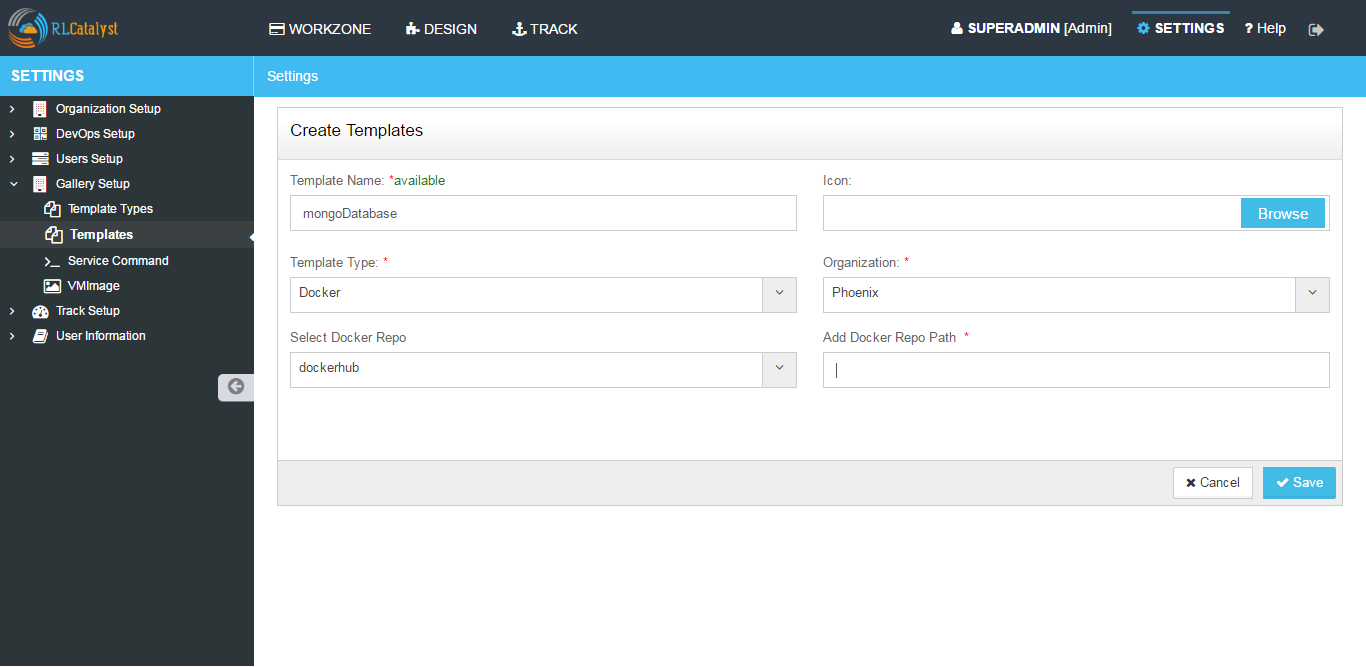
Click on Save button
Now new template is added and available in the Templates list
Adding a New Template For Cloud Formation Template Type
- From the main menu click on Settings
- Once you click on Settings, from the side menu click on Gallery Setup
- Click on Templates
- Click on New button provided
- Enter the template name in the Template Name field
- Upload an Icon by clicking on the Browse button
- Choose the template type ‘CloudFormation’ from the Template Type drop down list
- Choose the Organization from the Organizationdrop down list
- Browse the Template File
- Click on Save button
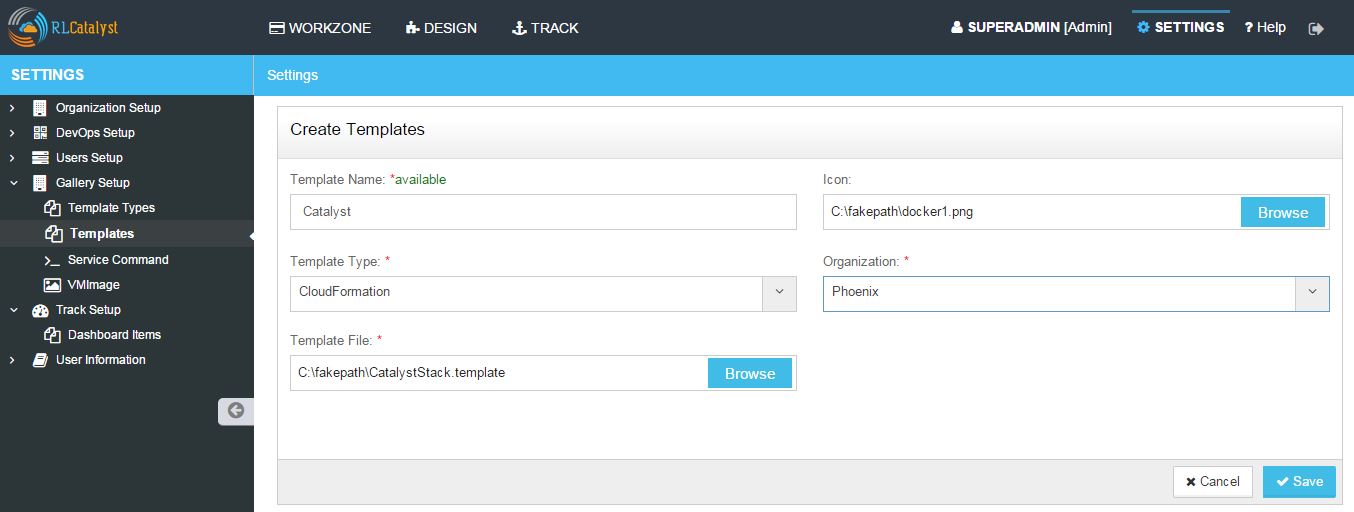
- Now new template is added and available in the Templates list
Adding a New Template For ARMTemplate Type
- From the main menu click on Settings
- Once you click on Settings, from the side menu click on Gallery Setup
- Click on Templates
- Click on New button provided
- Enter the template name in the Template Name field
- Upload an Icon by clicking on the Browse button
- Choose the template type ‘ARMTemplate’ from the Template Type drop down list
- Choose the Organization from the Organizationdrop down list
- Browse the Template File
- Click on Save button
Hereby attaching a video which will demonstrate as in how to Create Templates in RLCatalyst:
Service Command
Service Commands helps user to create a service associated with cookbooks which can run on the instance with the following actions Start, Stop and Restart.
Adding a new Service Command
- From the main menu click on Settings
- Once click on Settings, from the side menu click on Gallery Setup
- Click on Service Command
- Click on New button provided
- On Create Services page Select Organization, Enter Name, Choose Service Command Type as Chef Cookbook/Recipe , Select Chef Server, Service cookbooks as ‘service_apache’.
- Select the Actions.
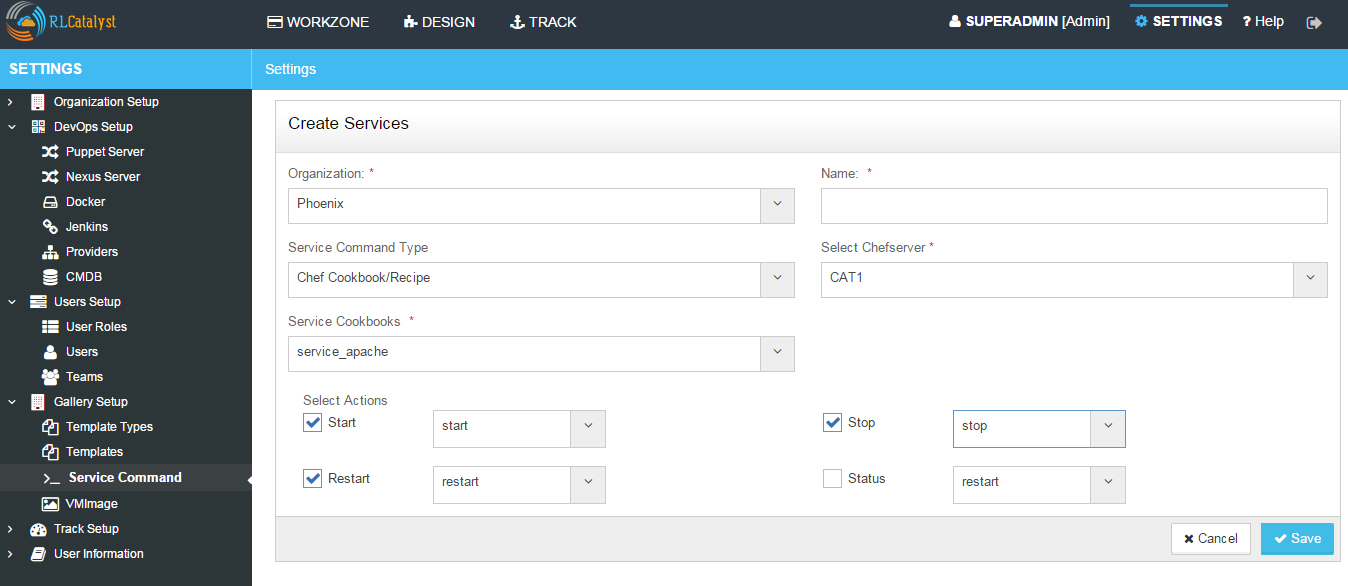
- Click on Save button
- Now your Service Command is setup and listed in the Services Page

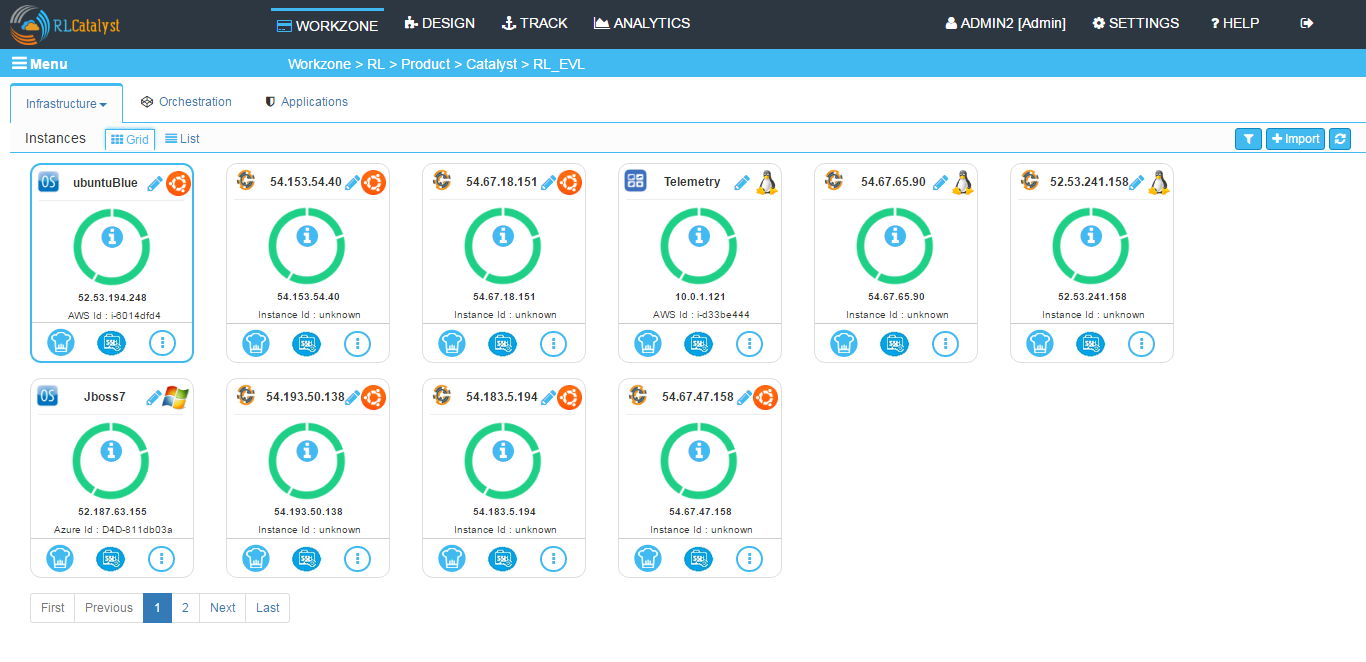
- Go to Workzone and Launch or Import a Node
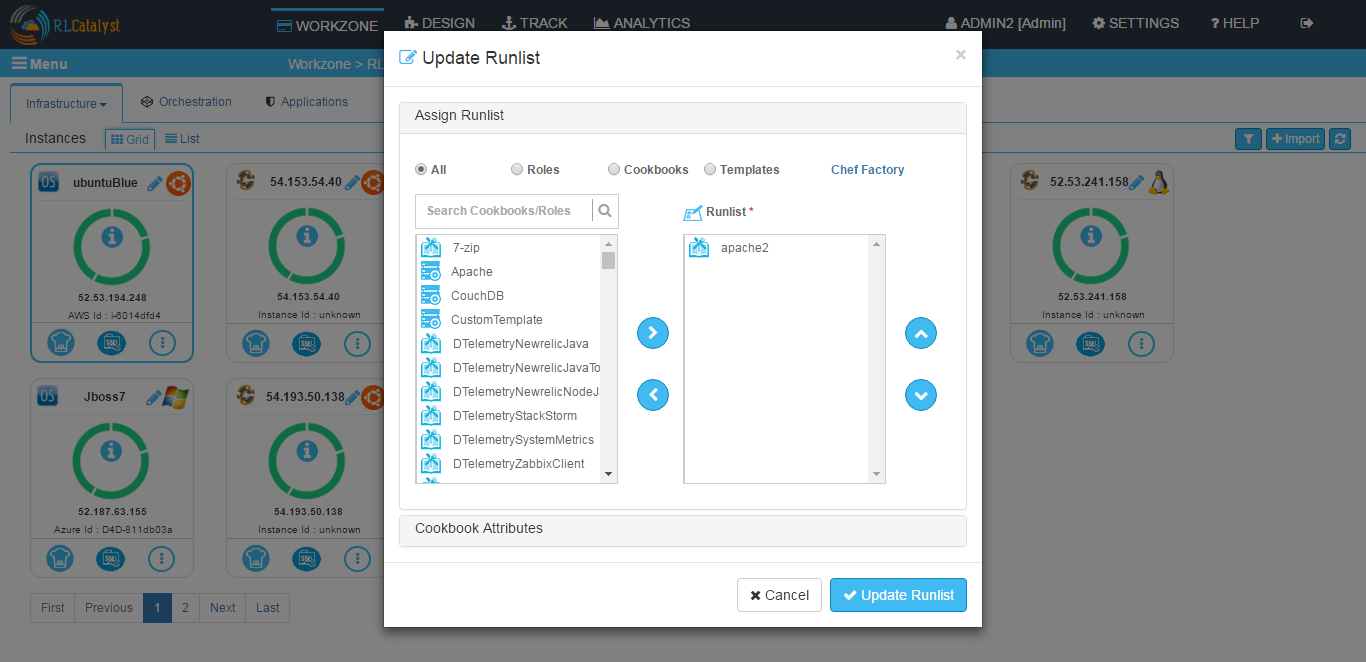
- Click on Chef Client run icon , add Apache2 cookbook to the runlist and click Update button. Wait until chefclient is success.
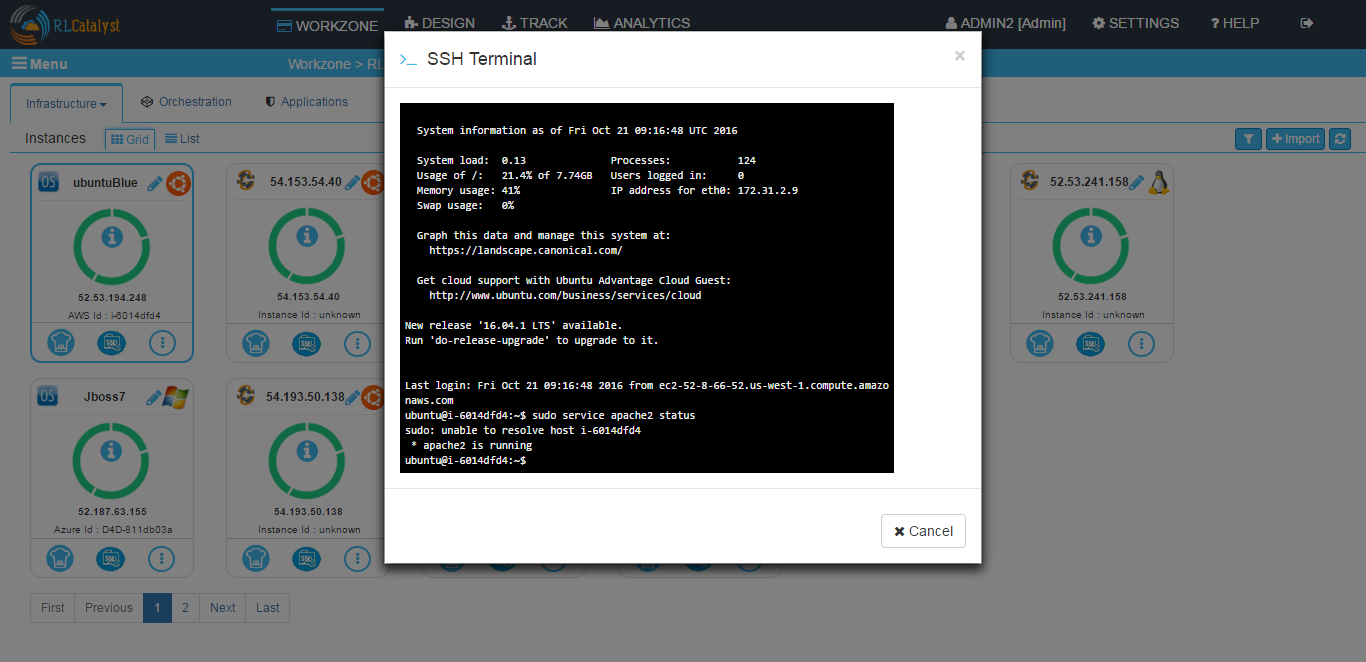
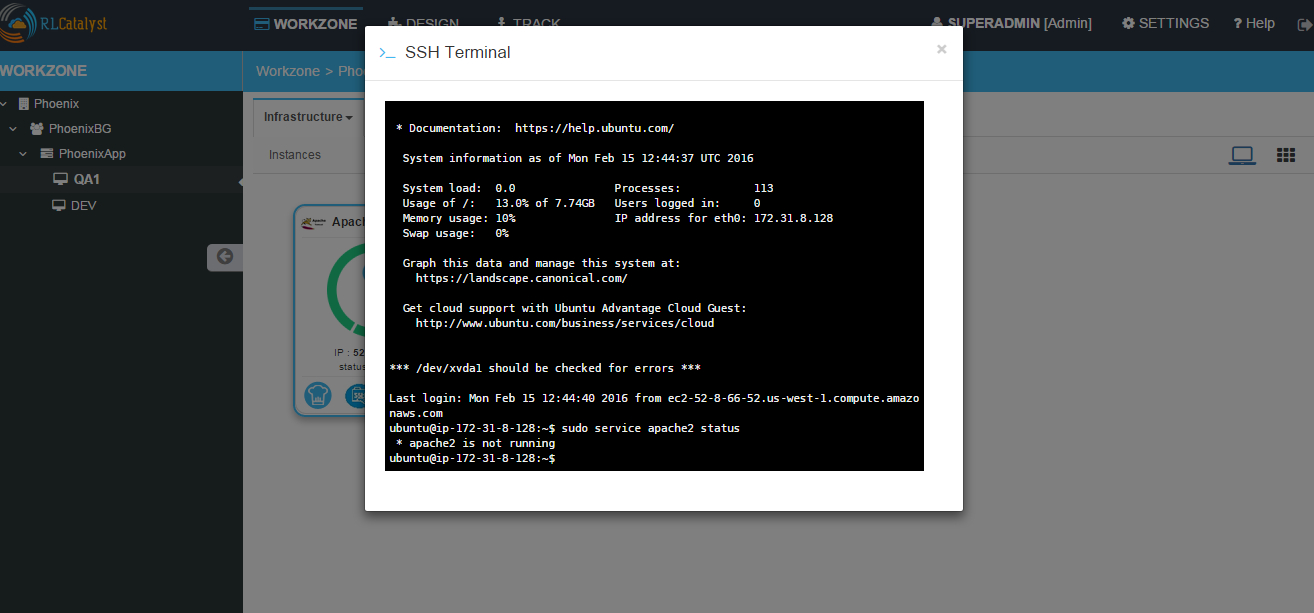
- When apache2 cookbook run successfully by default service will be running.Click on SSH icon and execute sudo service apache2 status command and verify apache2 is running.
- Close the SSH window
- Go to Instance control panel
- Go to Services tab and add the apache service and click on Save button
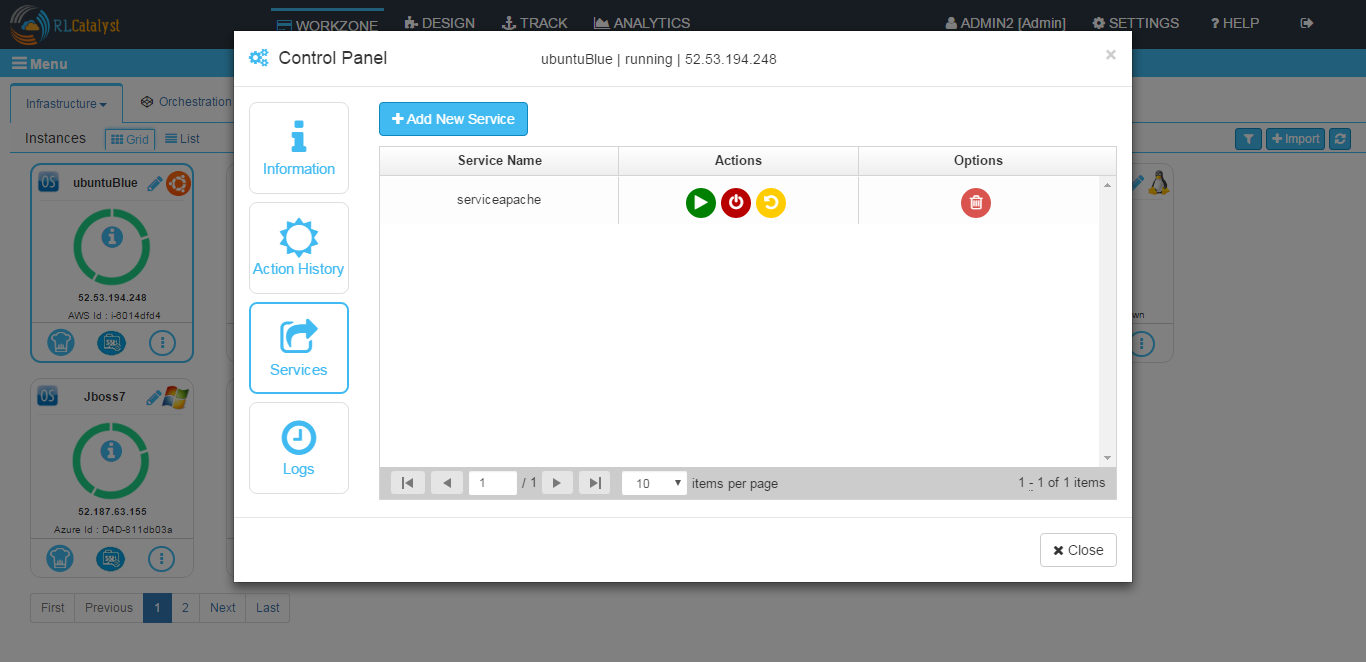
- Service is added to the Instance and Start,Stop and Restart buttons will be shown
- Click on Stop button (Red color) and wait until it succeeds
- Click on SSH icon
- Execute command sudo service apache2 status and verify apache2 is not running
Script Gallery
Script Gallery where we can add bash script file.
Currently we are supporting only bash scripts for installation.
To add your script:
Navigate to Design -> Gallery Setup -> Script Gallery -> +New
Now fill all required details:
- Script Name could be any name
- Choose Organization Name from drop down
- choose Script Type to Bash
- enter some Script Description
- choose Script file
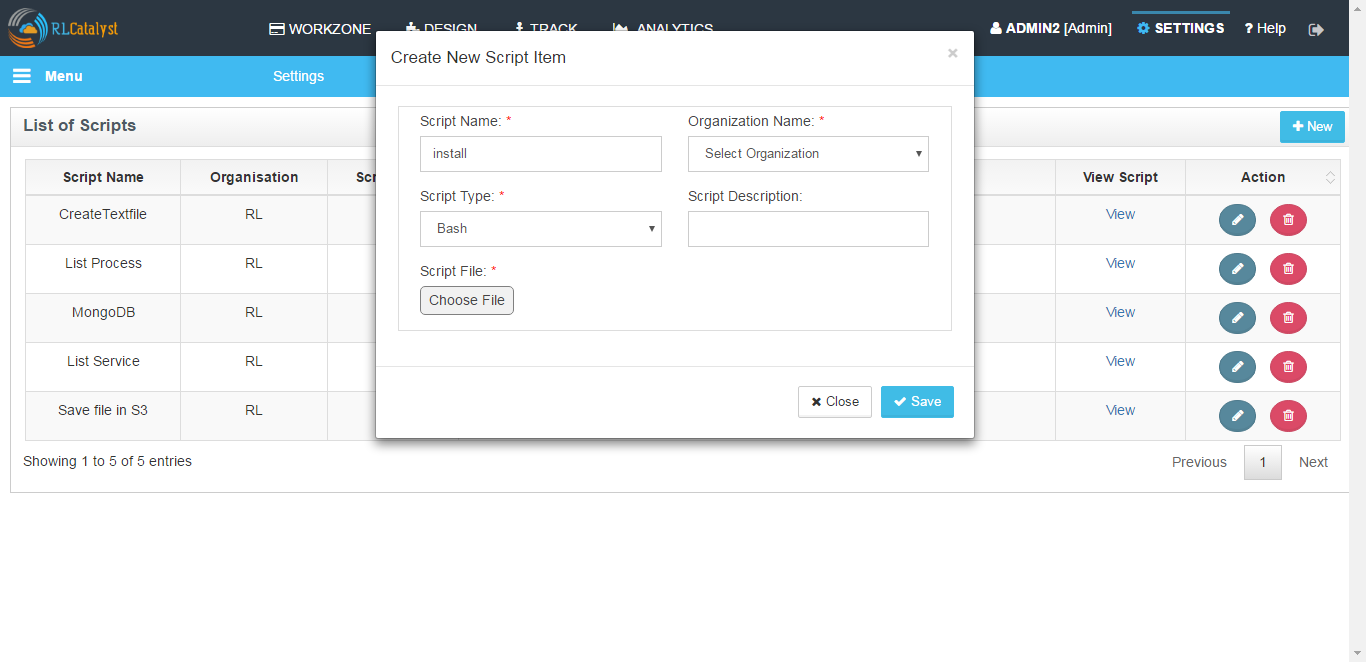
Once you will save it, it will be visible in the List of Scripts
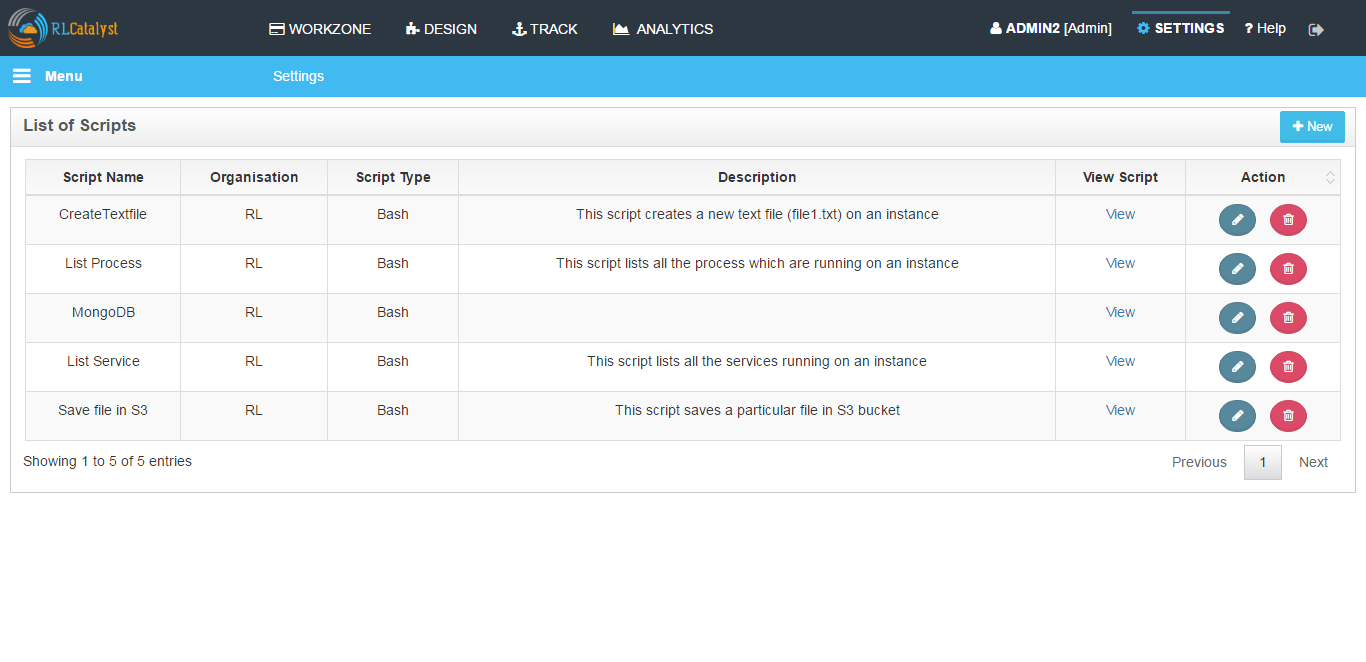
By clicking on edit button, you can see the script which you added and it would be Read Only.
Now, create Script Job by choosing Job type, Job Name, select nodes and select script which you want to add in your job
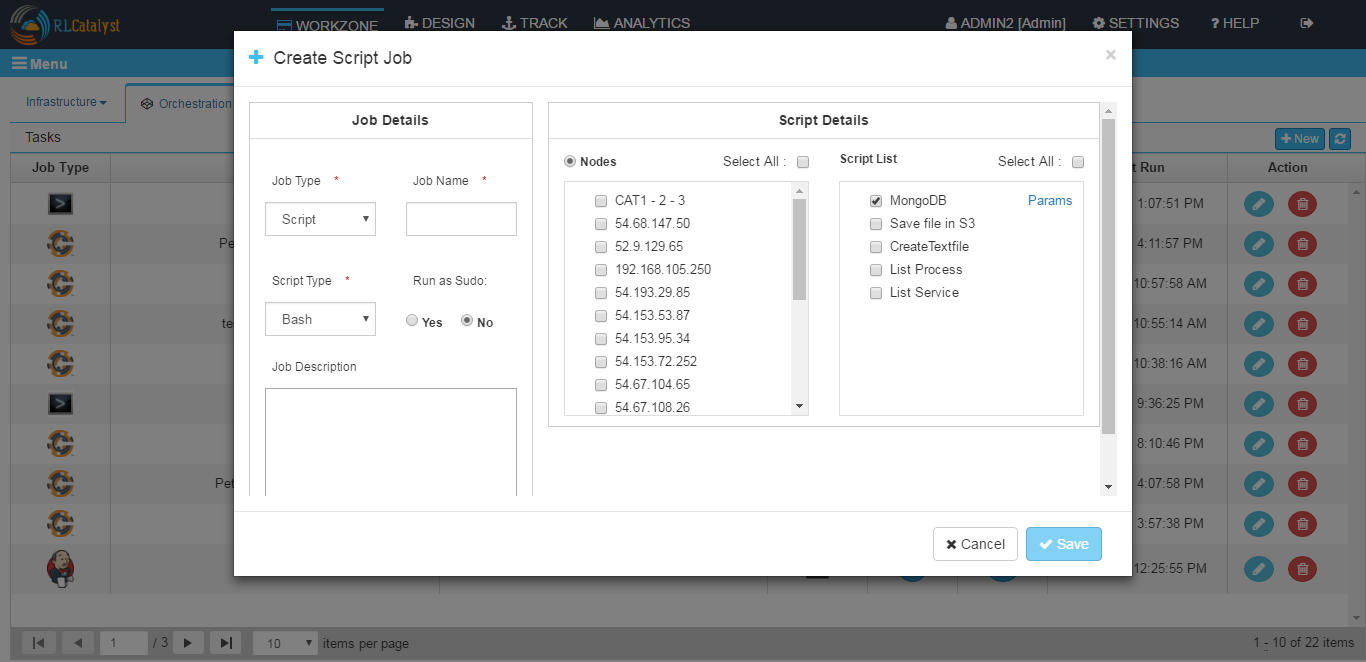
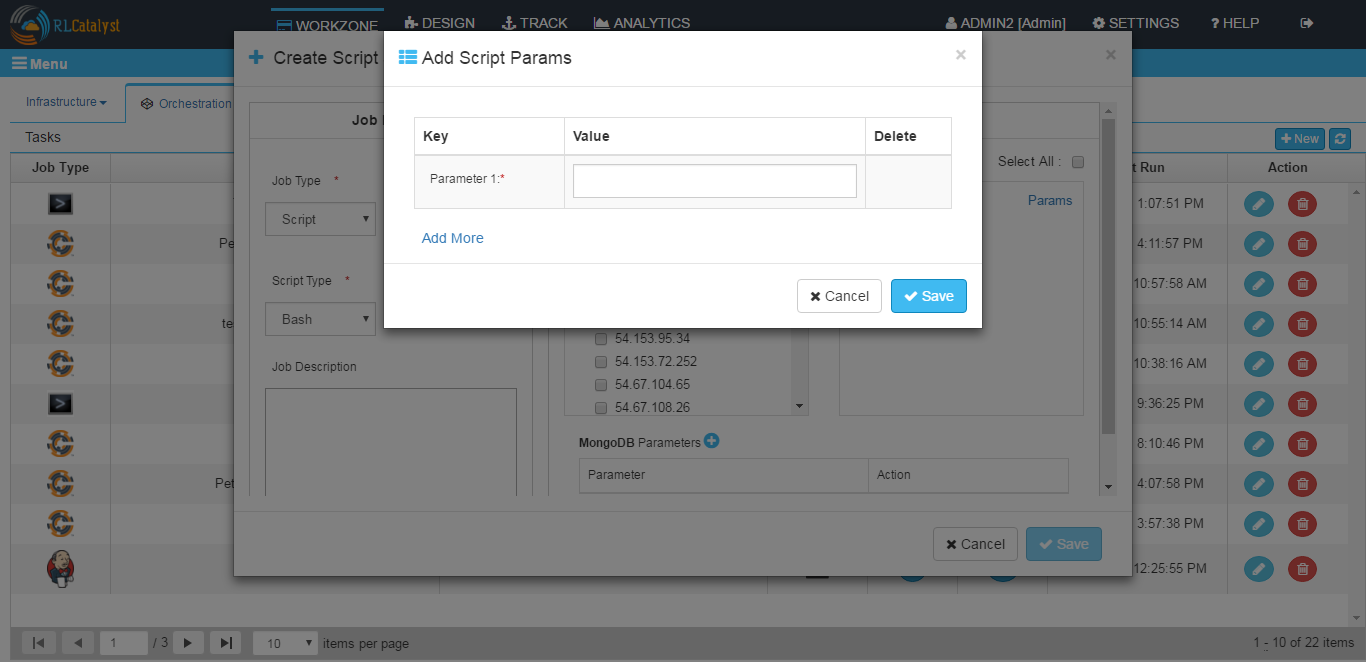
You can add parameters
Click on Save button and you can see your Script Job in Tasks under Orchestration tab in WORKZONE
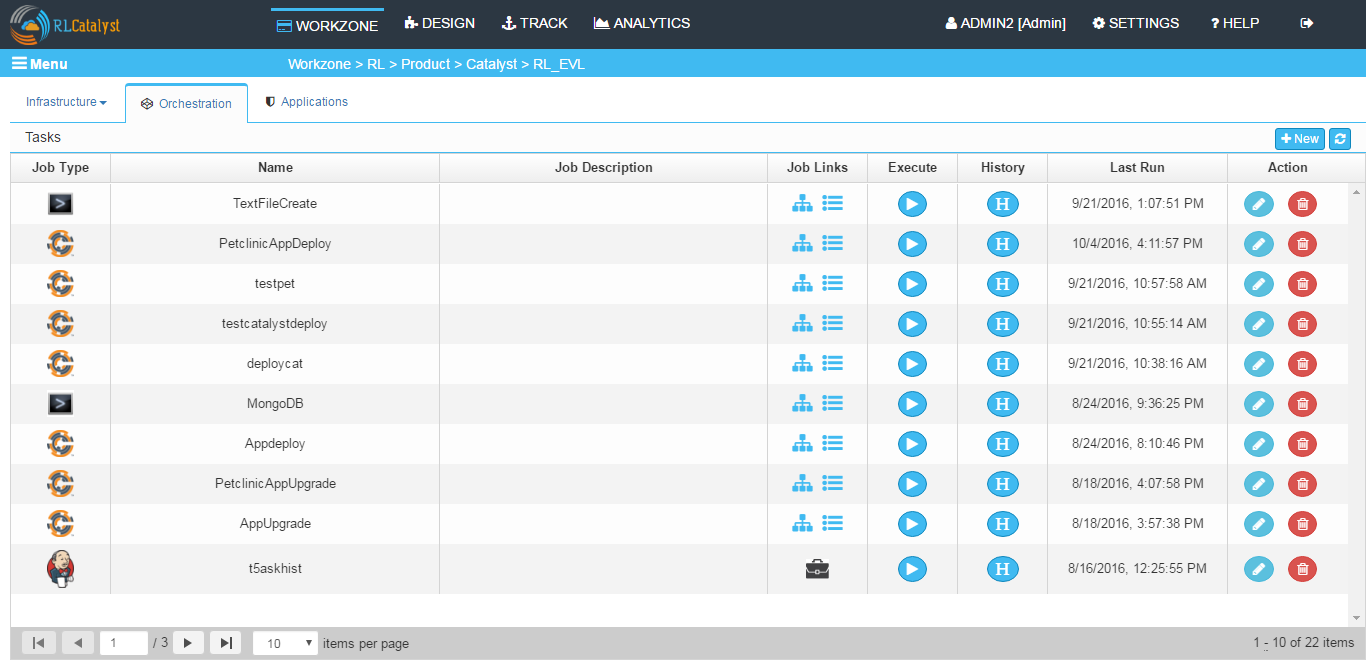
Now from here you can execute your task. By clicking execute button script will be executed on the selected node.