Nexus Server
Nexus is a repository manager. It allows you to proxy, collect, and manage your dependencies so that you are not constantly juggling a collection of JARs. It makes it easy to distribute your software. Internally, you configure your build to publish artifacts to Nexus and they then become available to other developers. You get the benefits of having your own ‘central’, and there is no easier way to collaborate.
RLCatalyst works with different repositories where you have kept your artifacts . If you have a nexus repository, add it here
To configure a new Nexus server follow the steps below:
- From the main menu click on Settings
- Once you click on Settings, from the side menu click on Devops Roles
- Click on Nexus Server
- Click on New button provided
- Enter the Nexus server name in the Nexus Server Name field
- Enter nexus server username in the User Name field
- Enter nexus server password in the Password field
- Enter nexus server URL in the Nexus Server URL field
- Choose the organization from the Organization drop down list
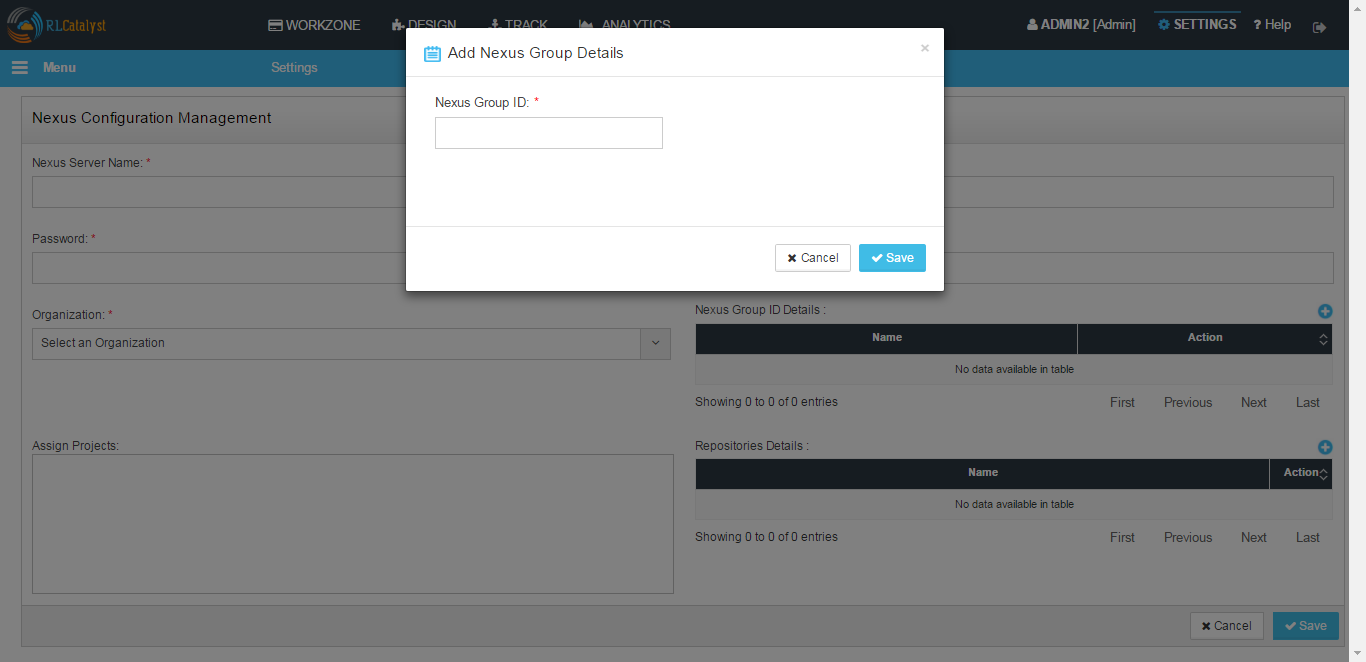
- Click on + icon present next to Nexus Group ID Details and enter valid Nexus GroupID and save
- Assign Projects are optional
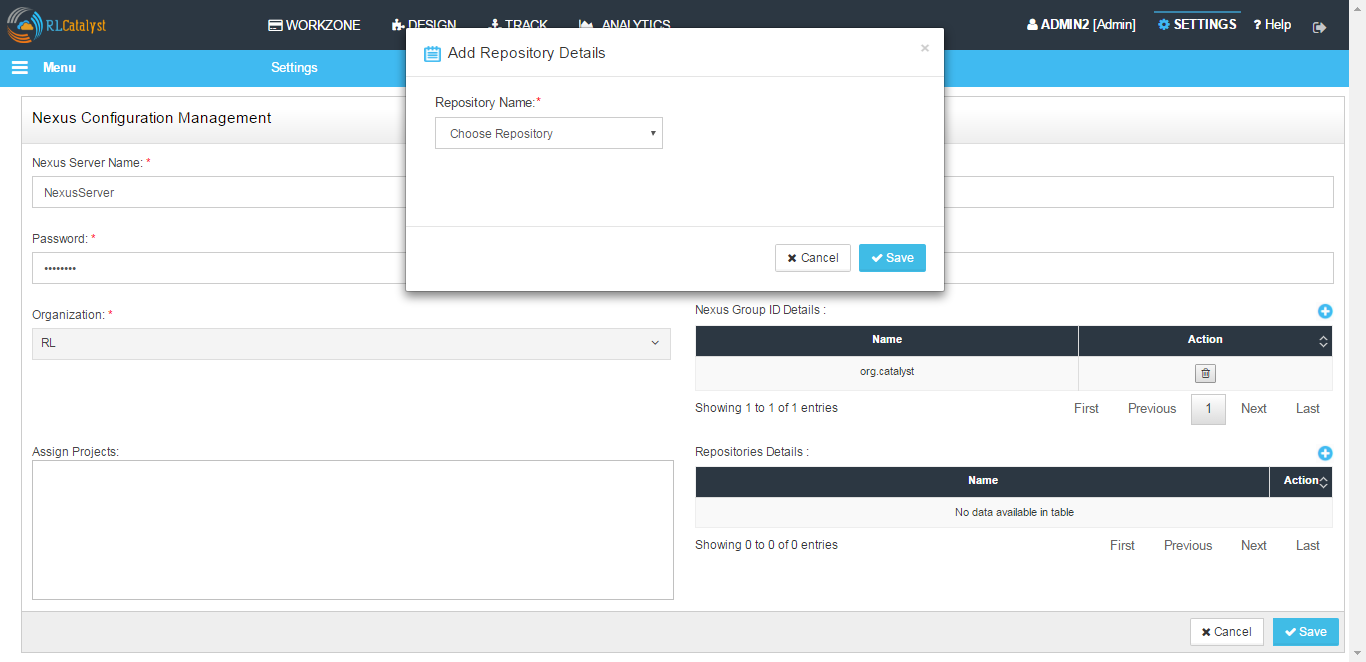
- Click on + icon present next to Repository Details and select valid Repository Name from the drop down and save
- Click on Save button
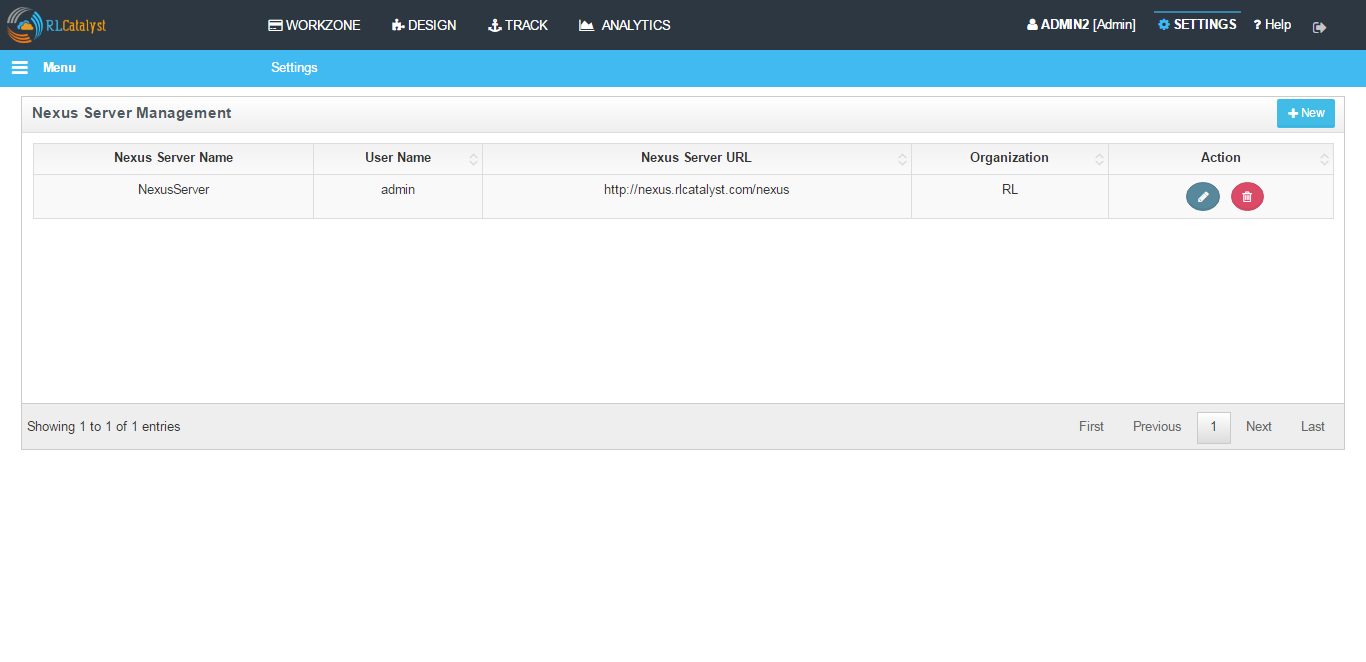
- Now the Nexus server setup is ready and listed in the Nexus Server page
Hereby attaching a video which will demonstrate as in how to Create Nexus in RLCatalyst:
Docker
Docker is all about making it easier to create, deploy, and run applications by using containers. Containers allow a developer to package up an application with all of the parts it needs, such as libraries and other dependencies, and ship it all out as one package.
You can configure the Docker setup with RLCatalyst. To configure the Docker setup follow the steps below:
- From the main menu click on Settings
- Once you click on Settings, from the side menu click on Devops Roles
- Click on Docker
- Click on New button provided
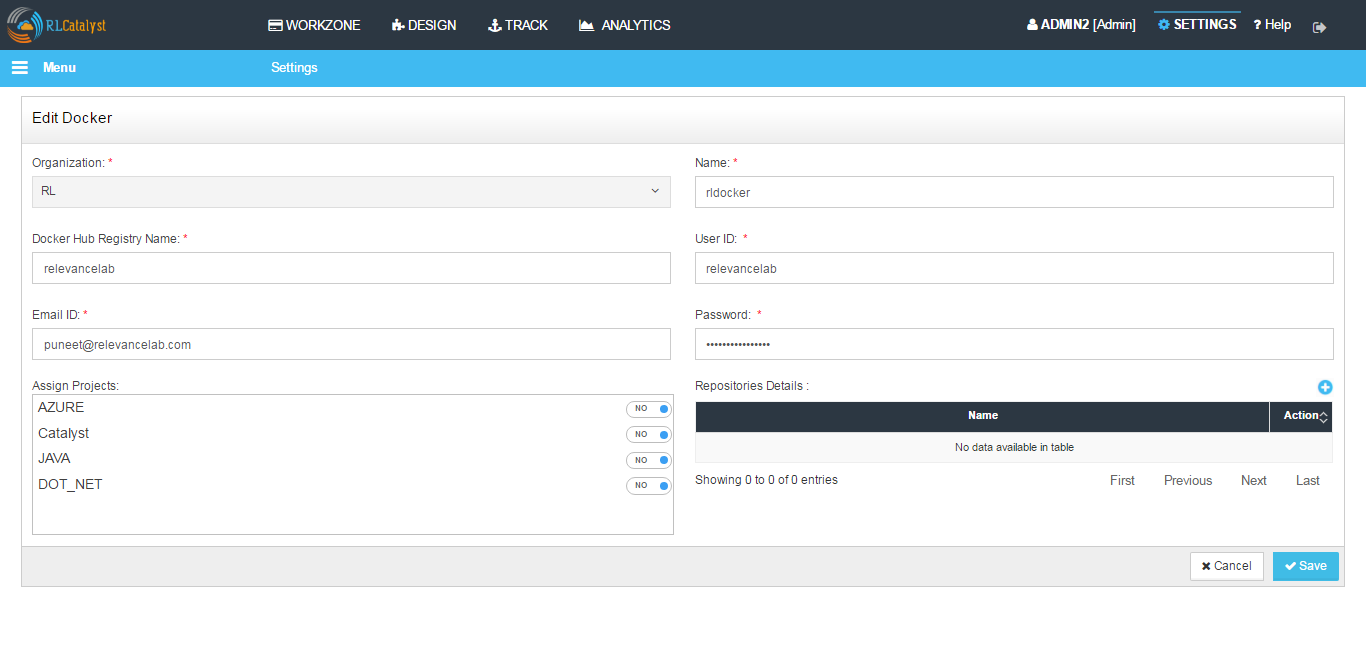
- Select the Organization from the Organization drop down list
- Provide a reference name in the Reference Name field
- Provide the registry in the Docker Hub Registry field provided
- Provide the Docker user ID in the User ID field
- Provide the email address to connect to the Docker in the Email Id field
- Enter the Docker password in the Password field
- All assigned projects will display in Assign Projects field
- Add Repositories Details
- Click Save button
- Now Docker is successfully configured to RL Catalyst
Hereby attaching a video which will demonstrate as in how to Create Docker in RLCatalyst:
Jenkins
Jenkins is CI/CD tool which can be used for build and deployment automation. You can configure the Jenkins setup with RLCatalyst.To configure the Jenkins setup follow the steps below:
- From the main menu click on Settings
- Once you click on Settings, from the side menu click on DevOps Roles
- Click on Jenkins
- Click on New button provided
- Select the Organization to which the Jenkins server will be attached to
- Enter the name in the Name field
- Enter the Jenkins Server URL
- Enter the user ID in the User ID field
- Enter the Jenkins password in the Password field
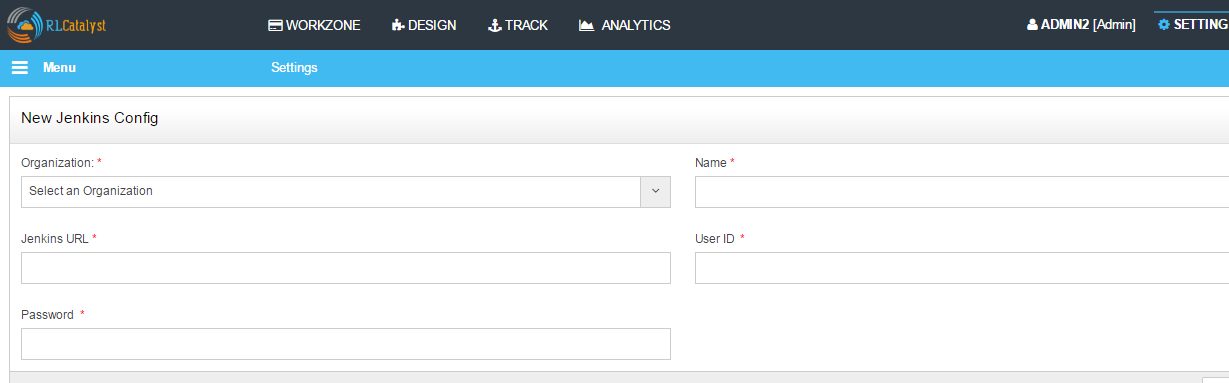
- Click Save button
- Now Jenkins is successfully configured to RLCatalyst
Hereby attaching a video which will demonstrate as in how to Create Jenkins in RLCatalyst: